 FinderBuddy
Setup help
Can't see FinderBuddy when you right-click?
Easy fix. Your Mac keeps new Finder add-ons switched off until you turn them on. Follow the steps for your macOS version. It takes about a minute.
First, check your macOS version
Click the Apple menu in the top-left corner of your screen and choose About This Mac. Look at the number next to macOS, then pick your steps:
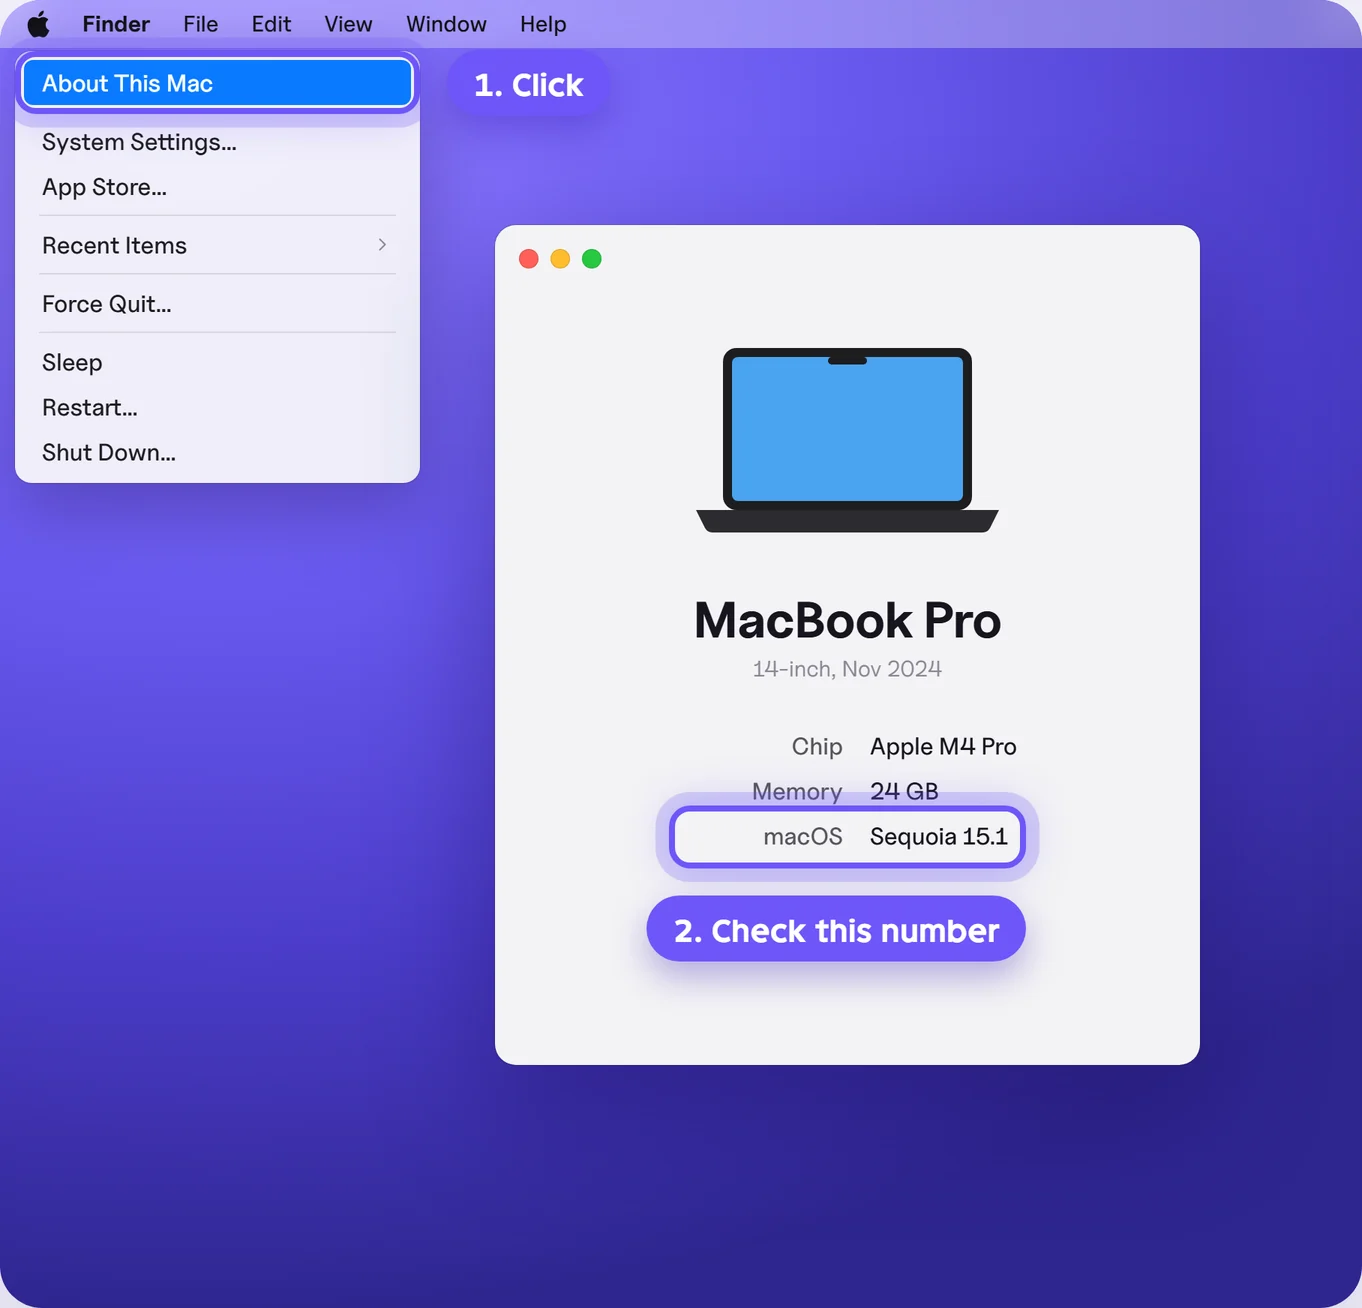
macOS 15.0 or 15.1
Fix it with Terminal
On these two versions, Apple left the switch for Finder add-ons out of System Settings. Apple brought it back in macOS 15.2. Until then, you can turn FinderBuddy on with Terminal. Don't worry, you only copy and paste two lines.
- 1
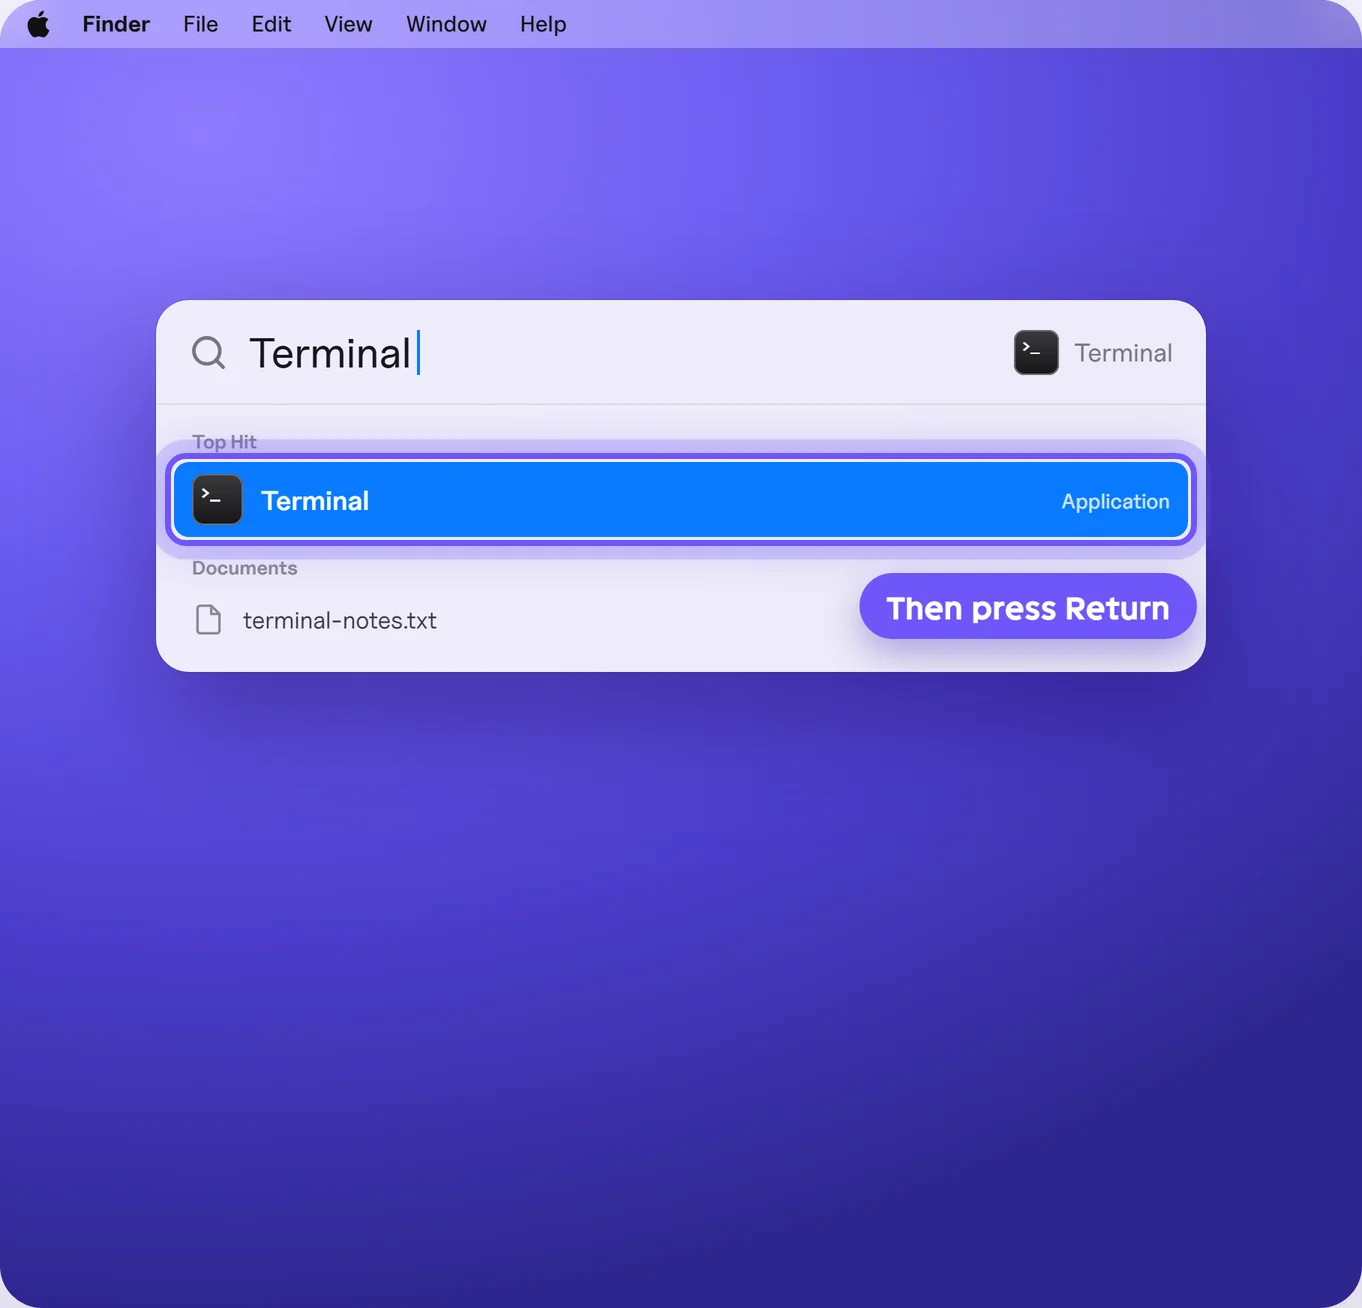
Open Terminal
Press Command + Space, type Terminal, and press Return.
- 2
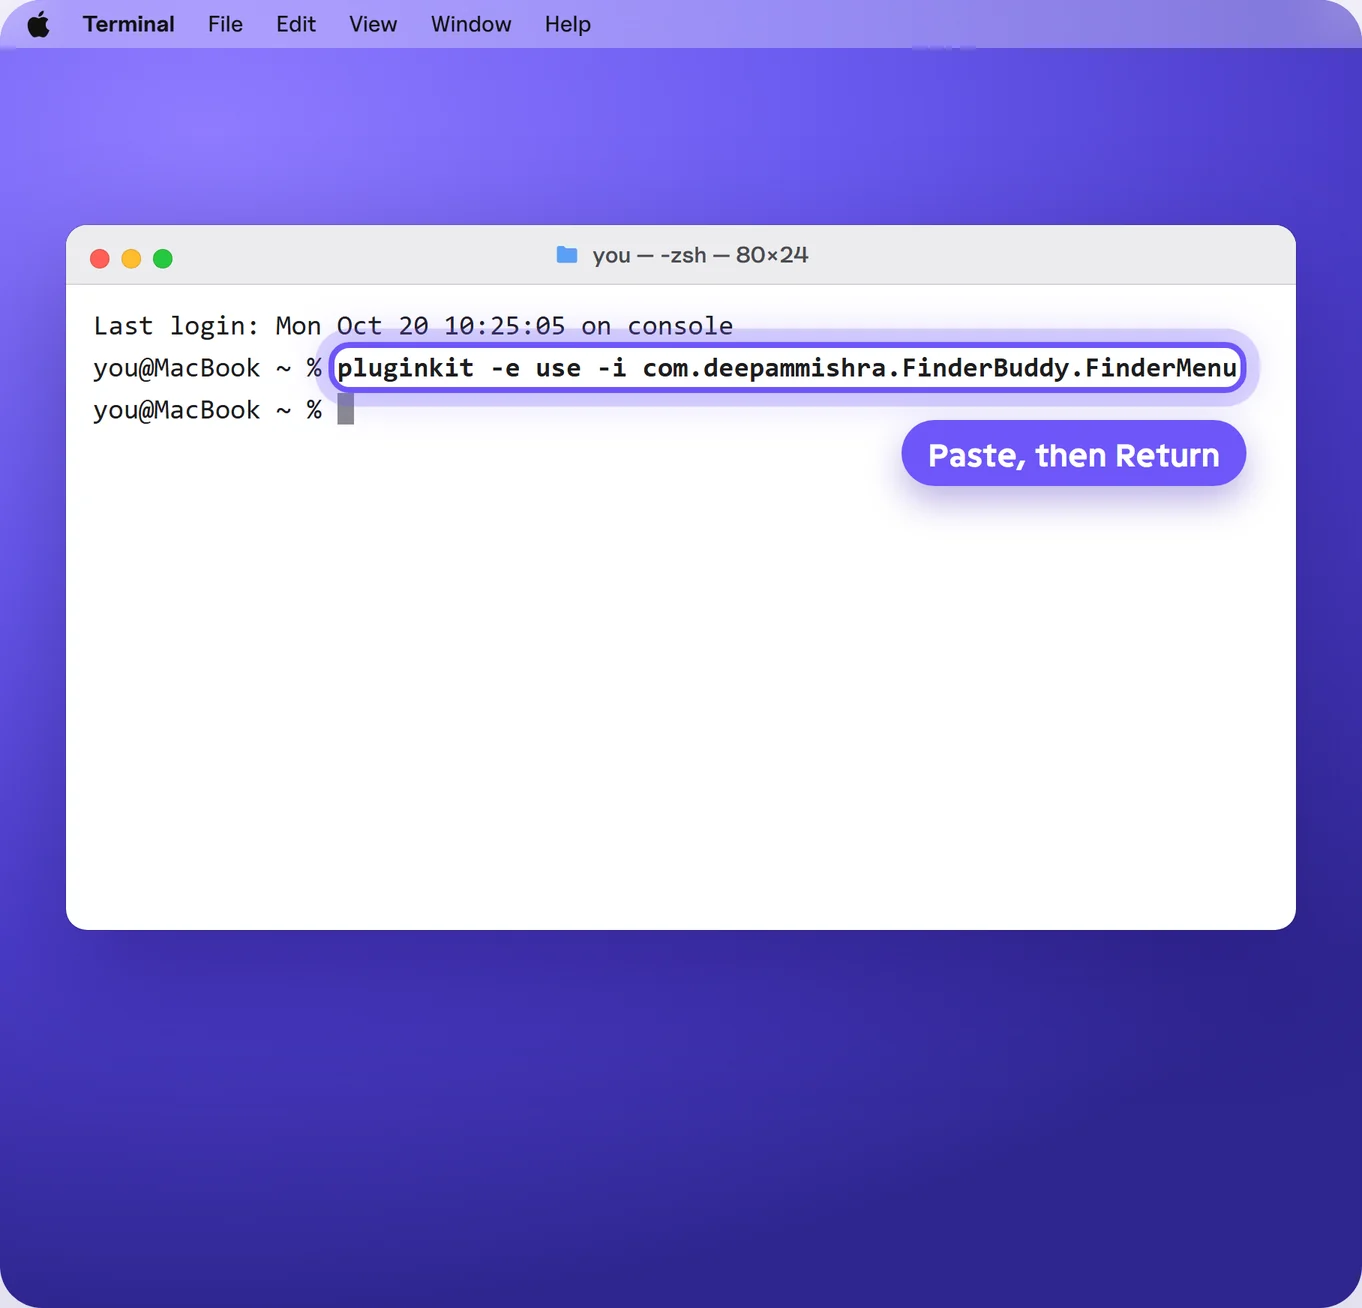
Copy this line into Terminal
Click Copy, paste it into Terminal, and press Return.
pluginkit -e use -i com.deepammishra. FinderBuddy. FinderMenu Nothing shows up after you press Return. That's normal. It means it worked.
- 3
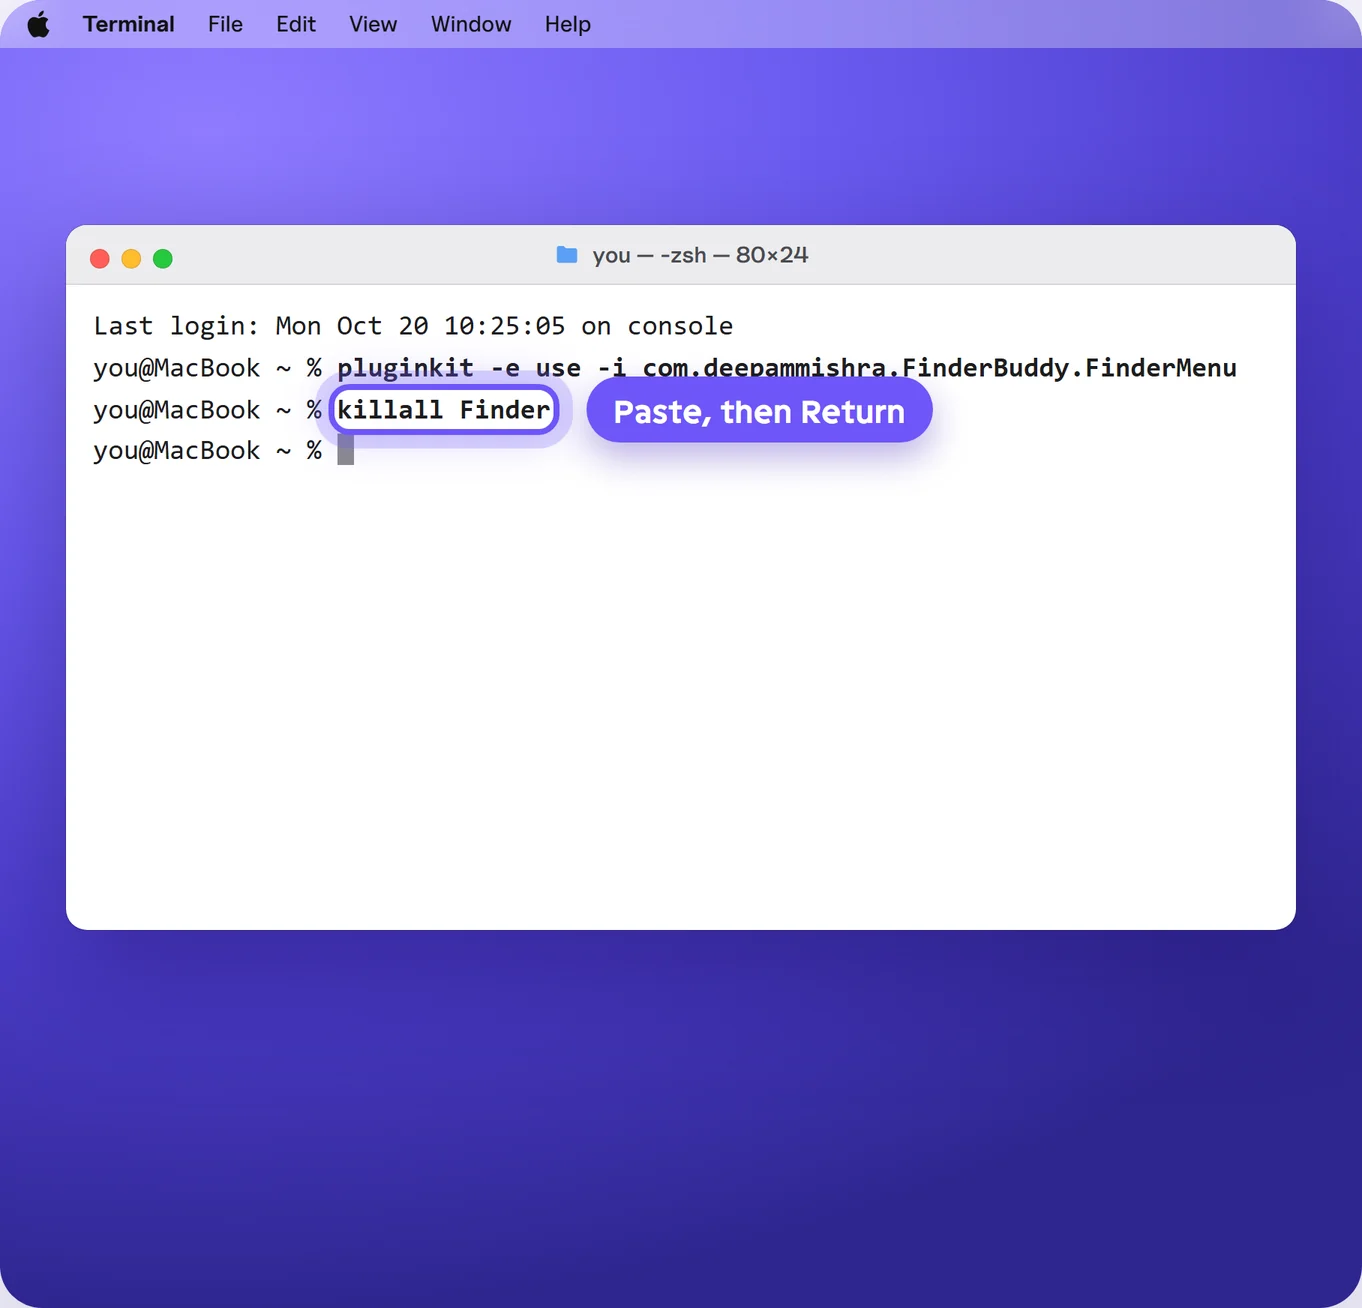
Restart Finder
Copy this line too, paste it into Terminal, and press Return.
killall FinderYour Finder windows close and open again. That's normal.
- 4
Right-click any file
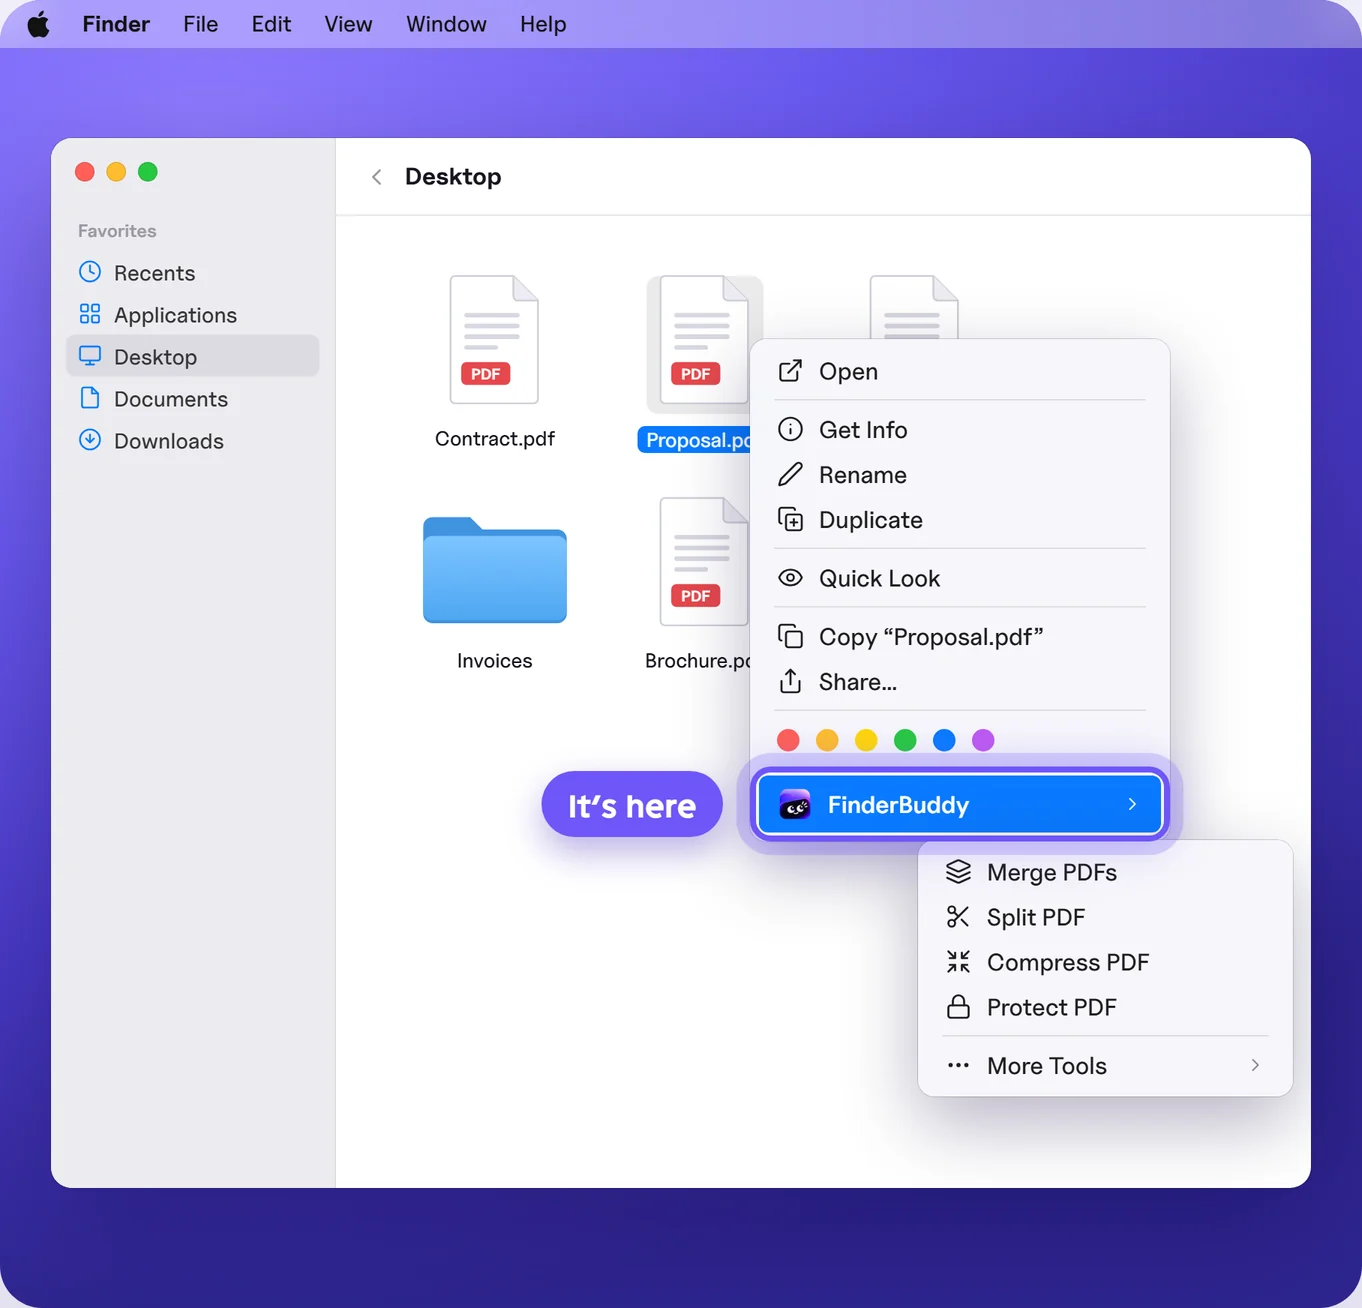
You'll see FinderBuddy at the bottom of the menu. That's it, you're all set.
macOS 15.2 or newer
Fix it in System Settings
Turn on FinderBuddy's Finder extension, then restart Finder.
- 1
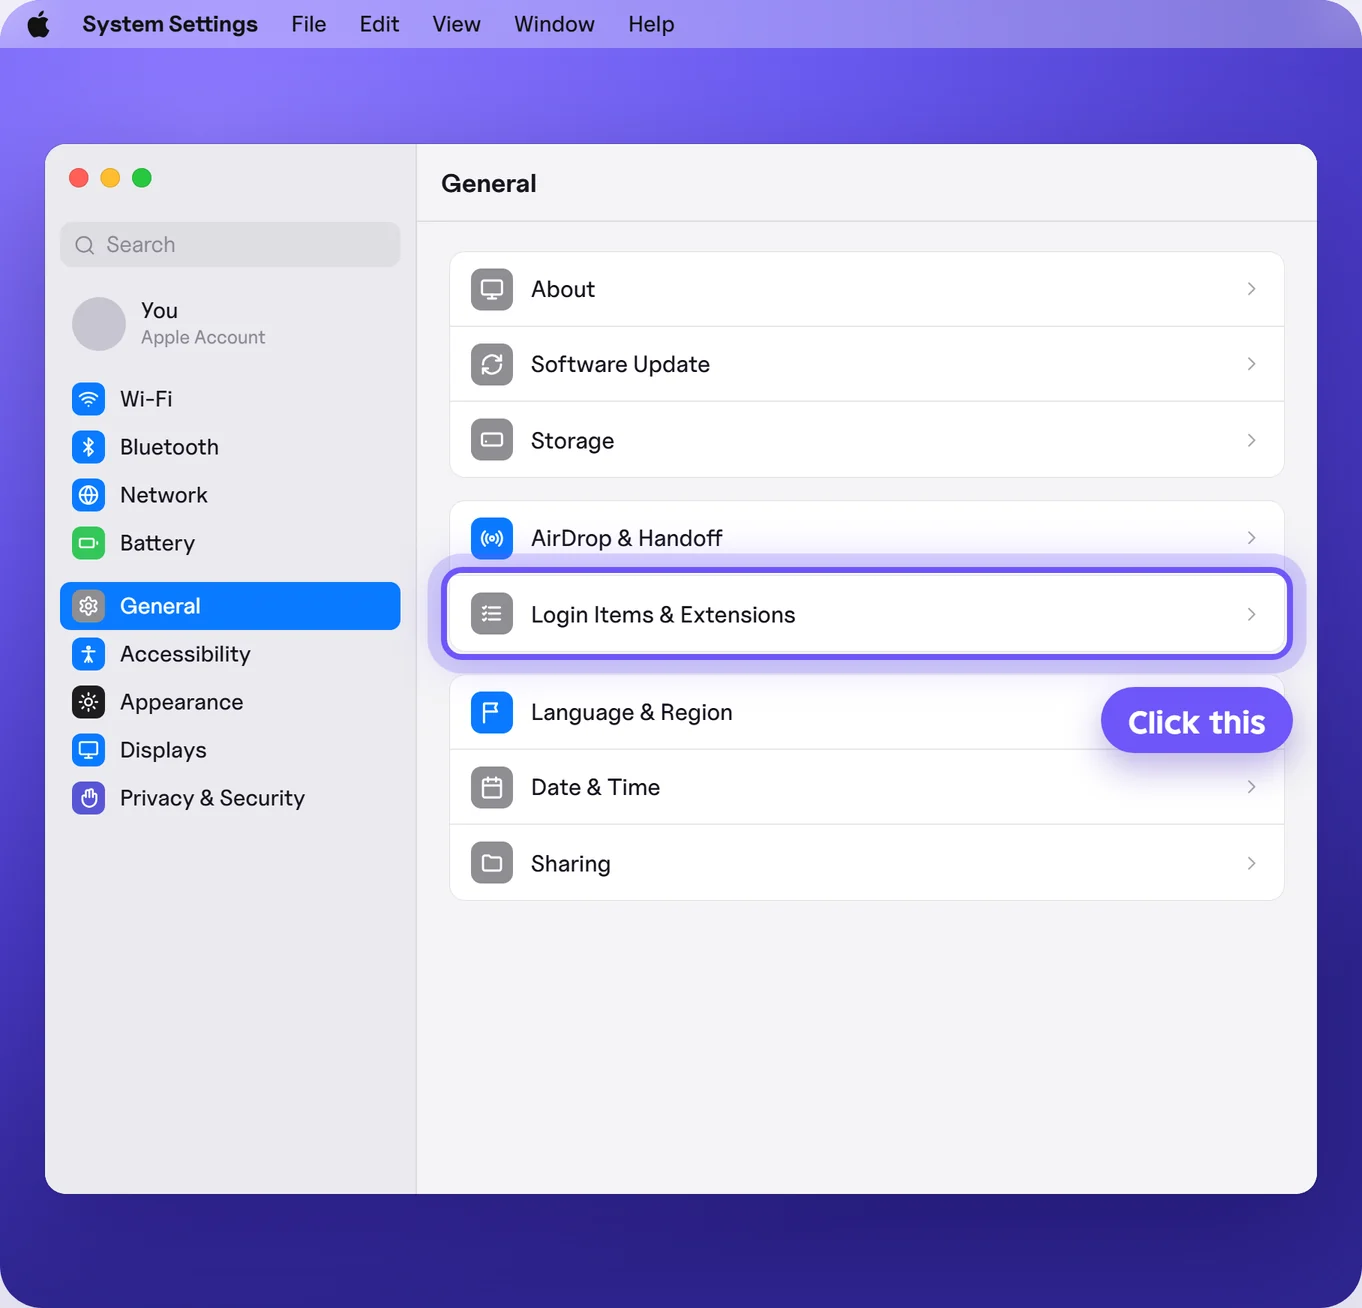
Open Login Items & Extensions
Click the Apple menu in the top-left corner, then System Settings → General → Login Items & Extensions.
- 2
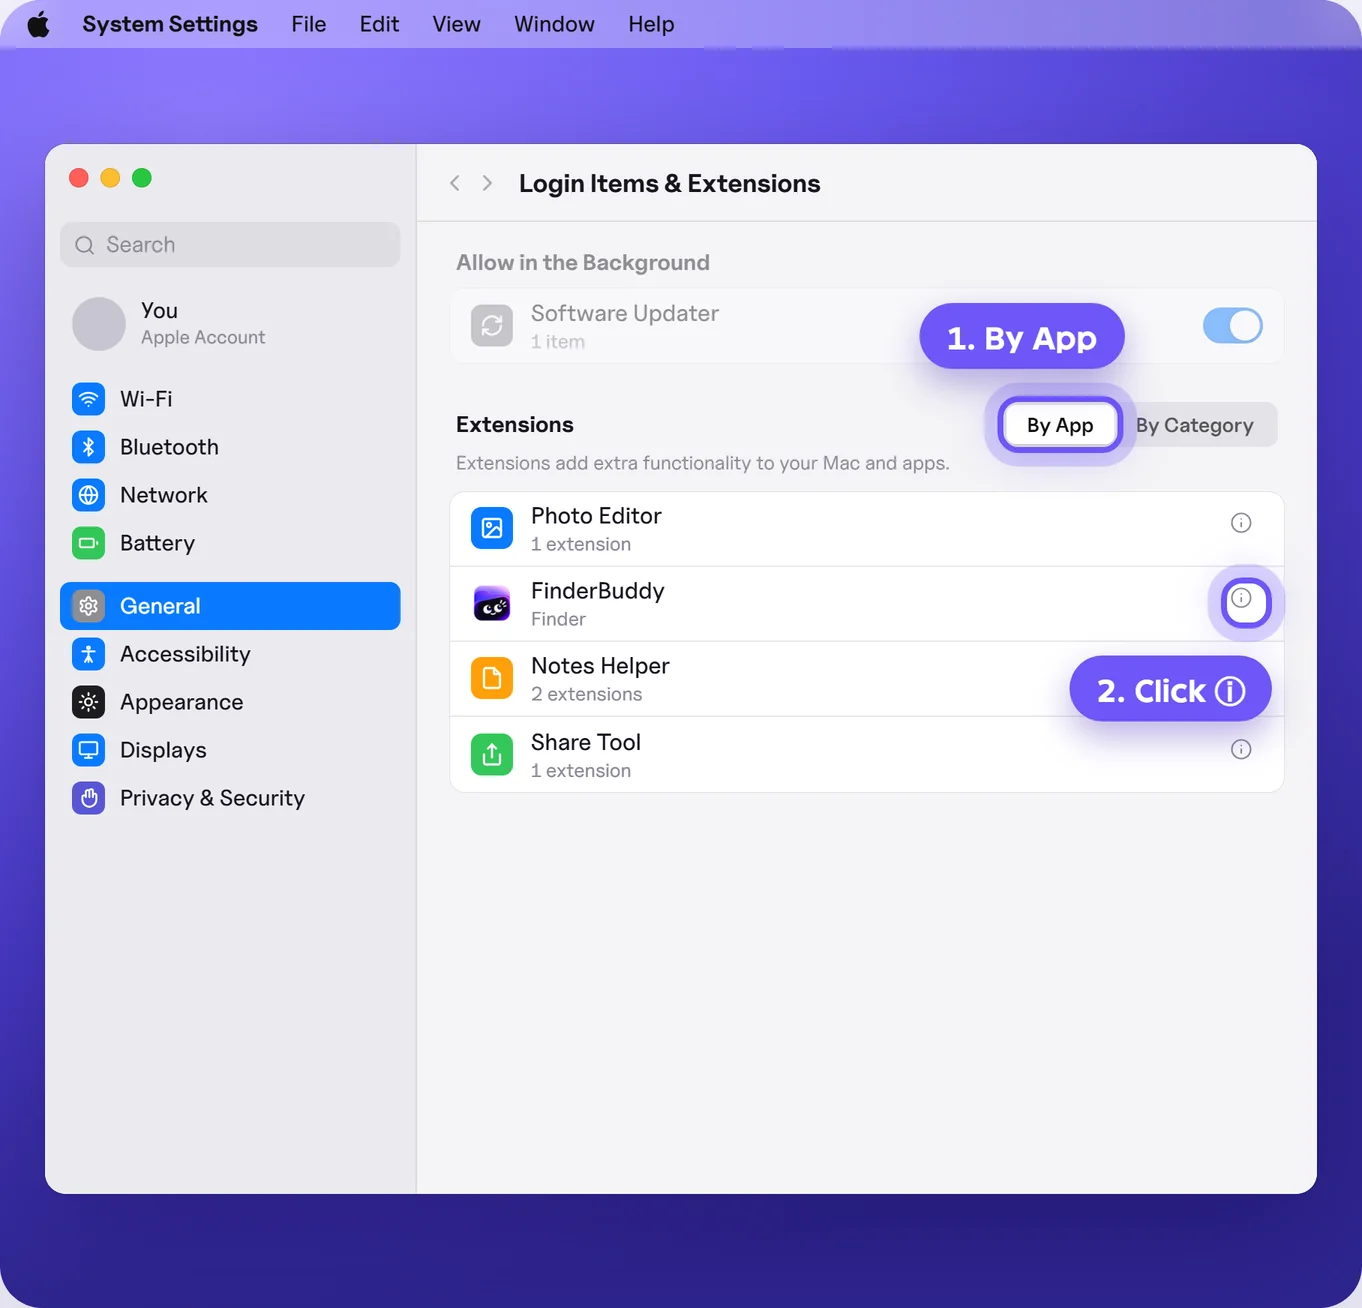
Find FinderBuddy under Extensions
Scroll down past Allow in the Background to Extensions. Choose By App, then click the ⓘ button next to FinderBuddy.
FinderBuddy isn't in the Allow in the Background list. That's normal, it doesn't need to be.
- 3
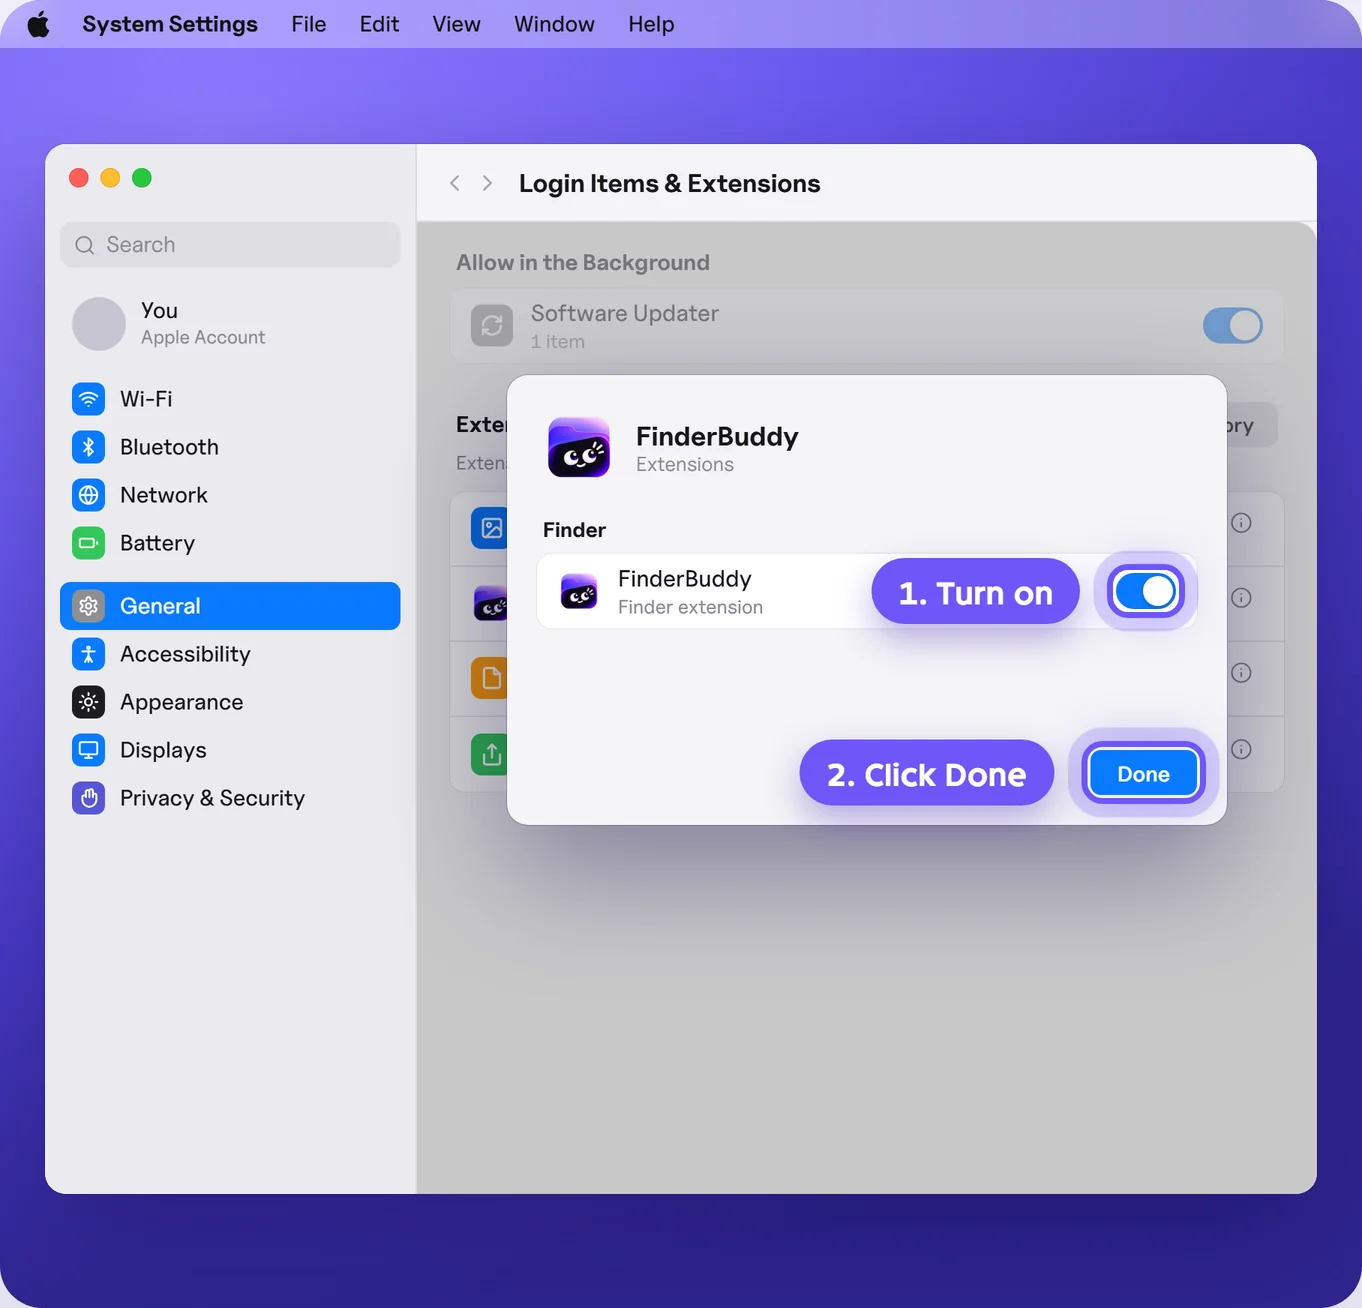
Turn it on
Switch on the FinderBuddy toggle, then click Done.
- 4
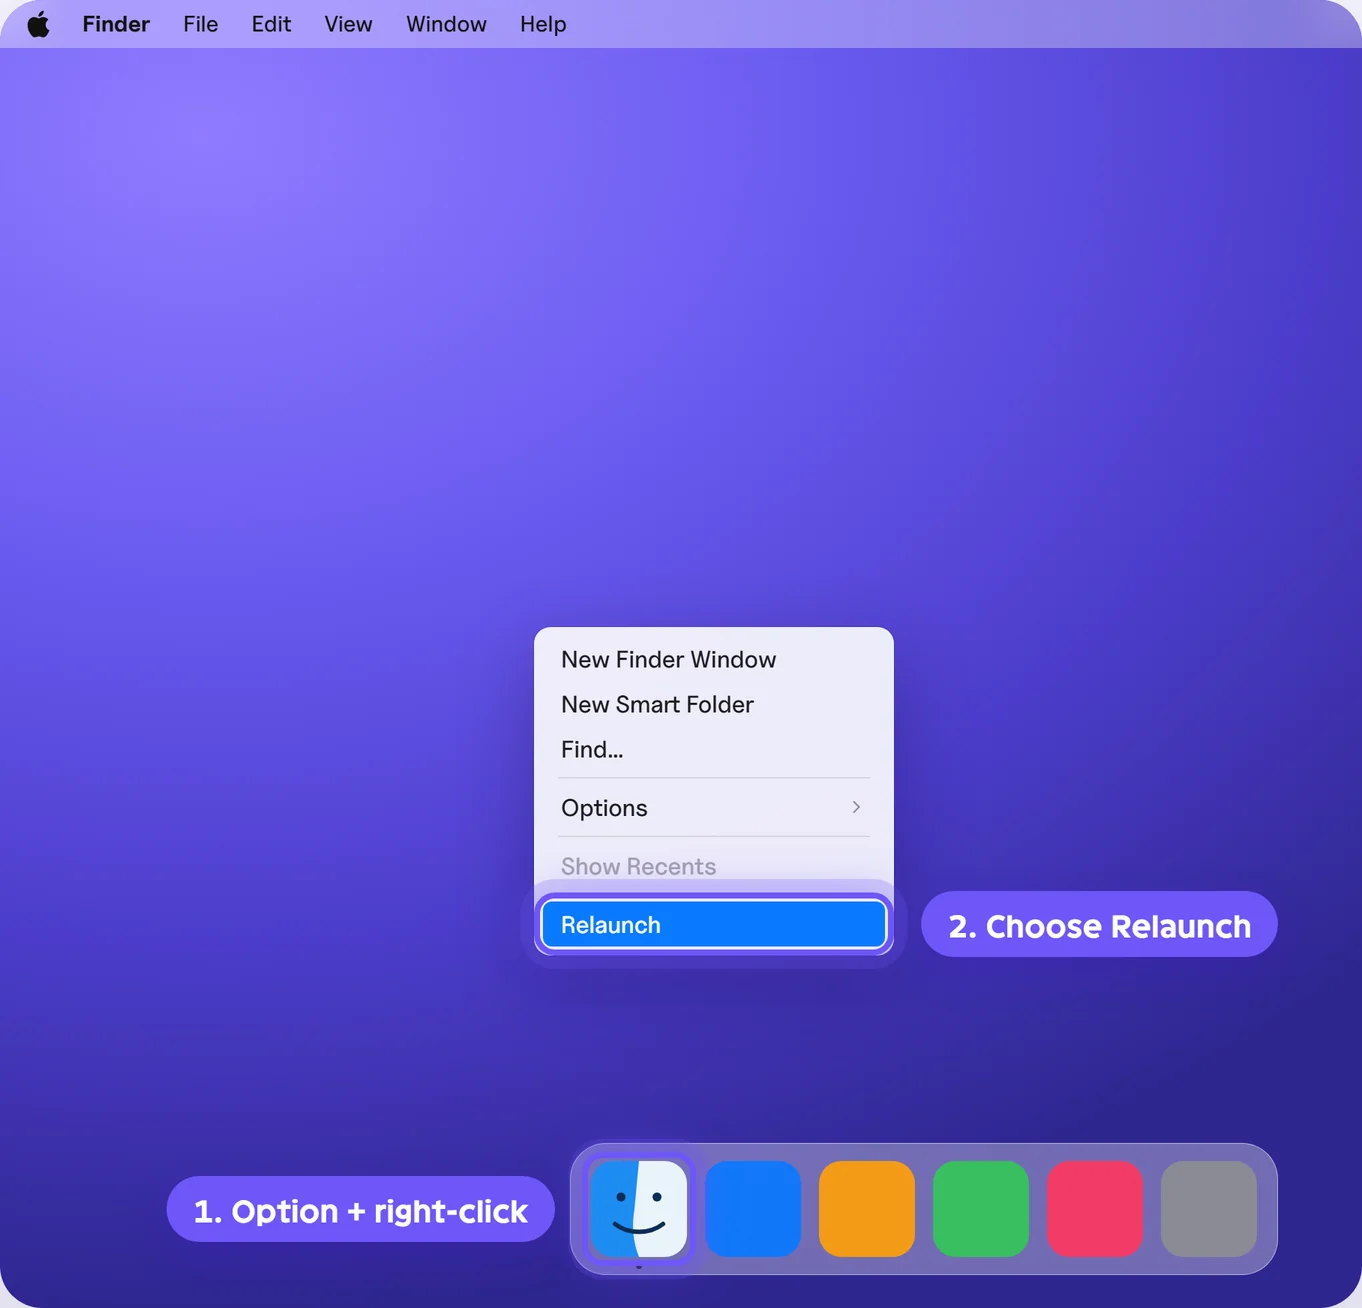
Relaunch Finder
Hold the Option key, right-click the Finder icon in your Dock, and choose Relaunch.
- 5
Right-click any file
You'll see FinderBuddy at the bottom of the menu. That's it, you're all set.
macOS 14 or older
Fix it in Privacy & Security
Open System Settings → Privacy & Security, scroll to the bottom, and click Extensions. Choose Added Extensions and tick the box next to FinderBuddy.
On macOS 12, it's System Preferences → Extensions → Added Extensions. Then restart Finder: hold Option, right-click the Finder icon in your Dock, and choose Relaunch.
Still not showing?
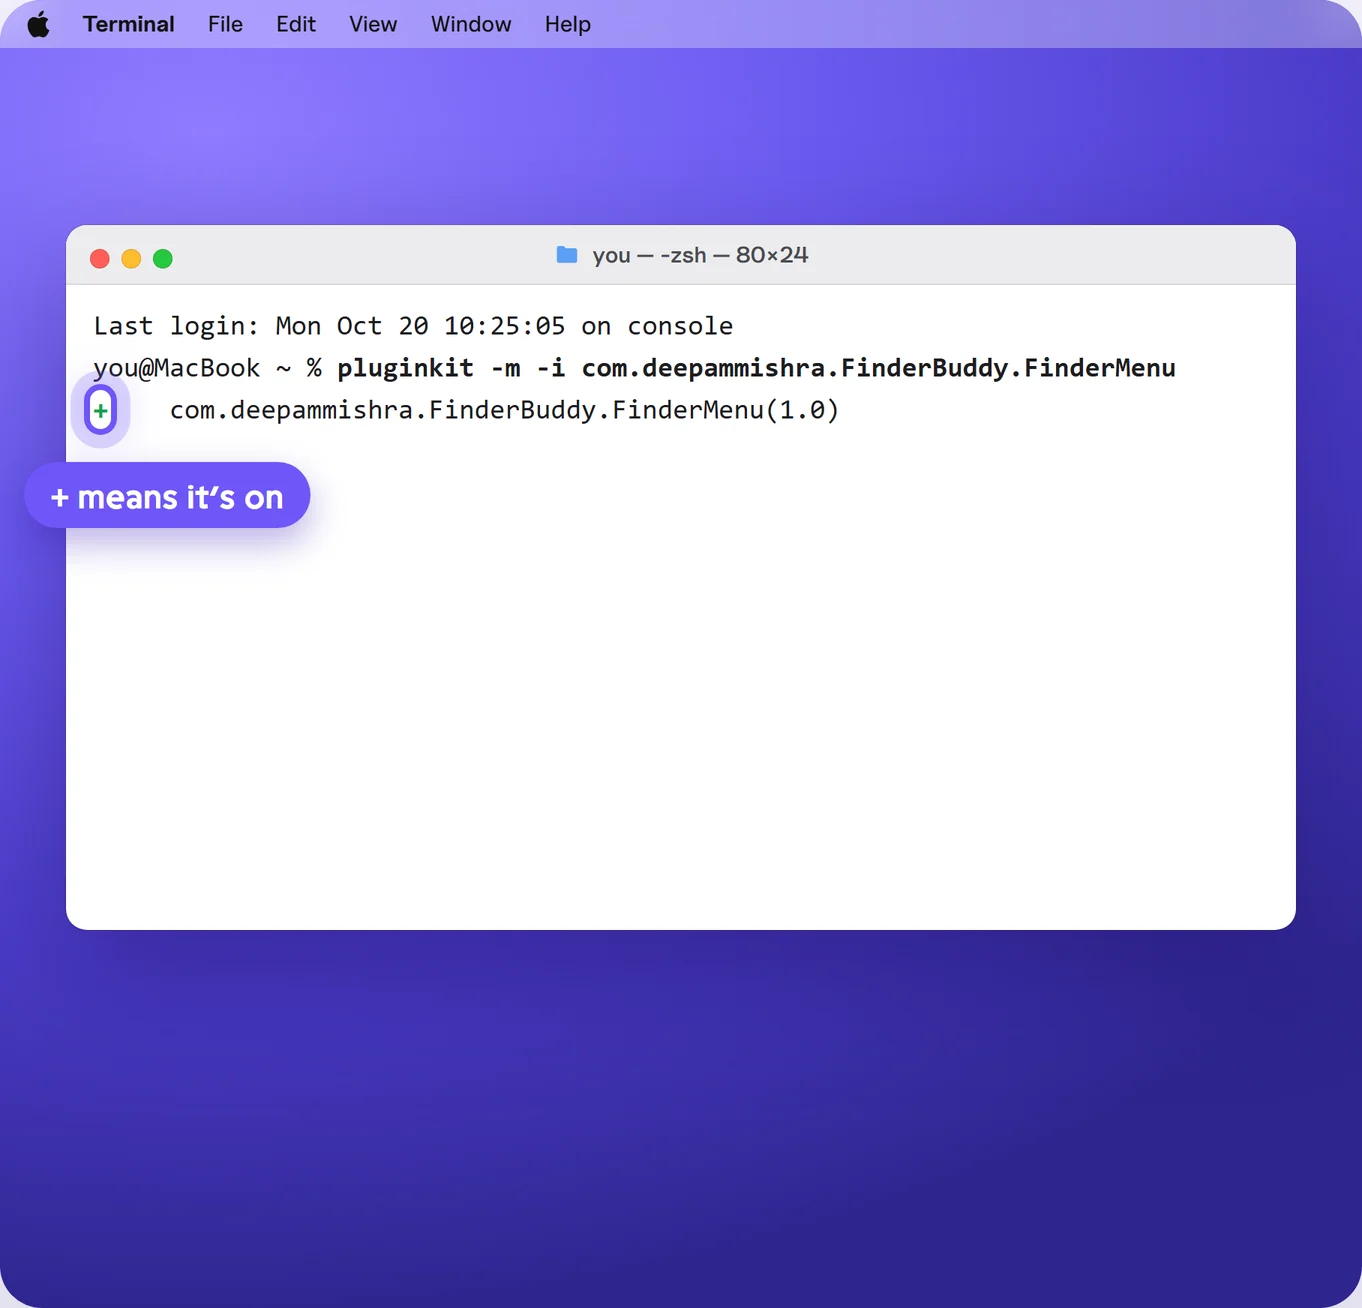
Check that it's on
Open Terminal, paste this line, and press Return.
pluginkit -m -i com.A + at the start means FinderBuddy is on. Restart Finder and right-click a file again.
See a - or nothing at all? Email support@finderbuddy.net with a screenshot of Terminal and your macOS version. We'll sort it out with you.
New to FinderBuddy? Start with the setup guide.